
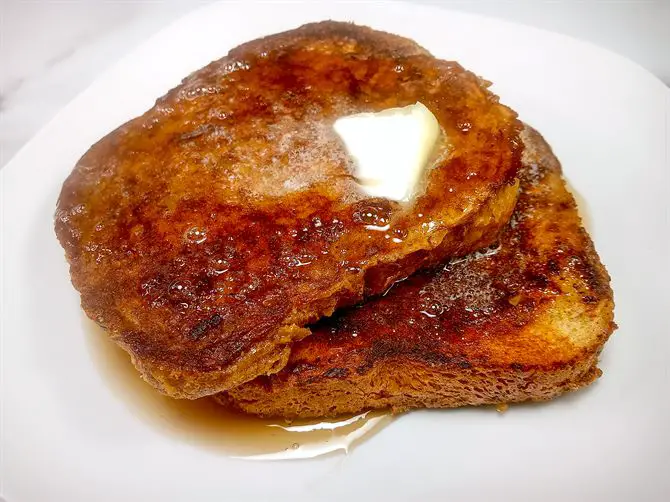
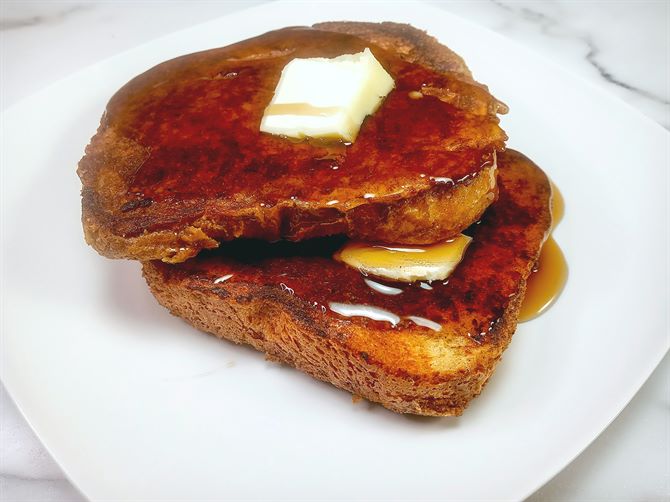
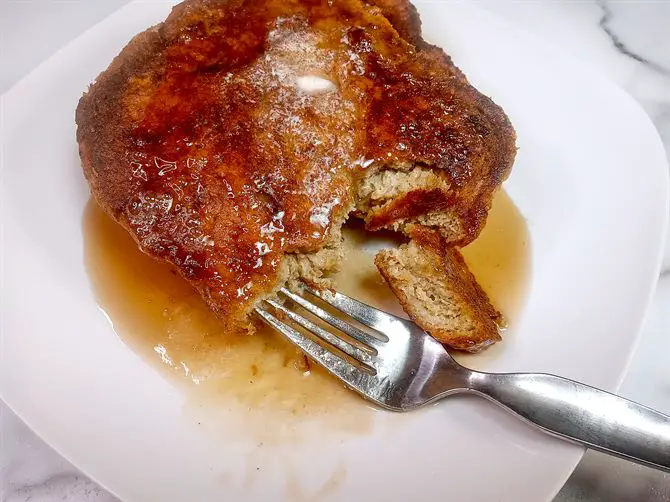
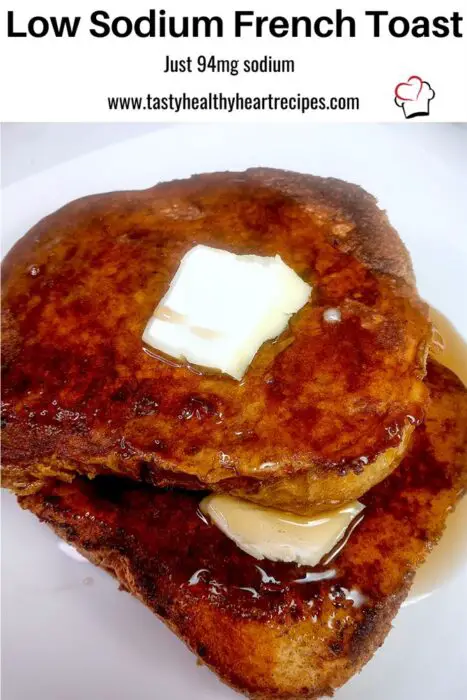
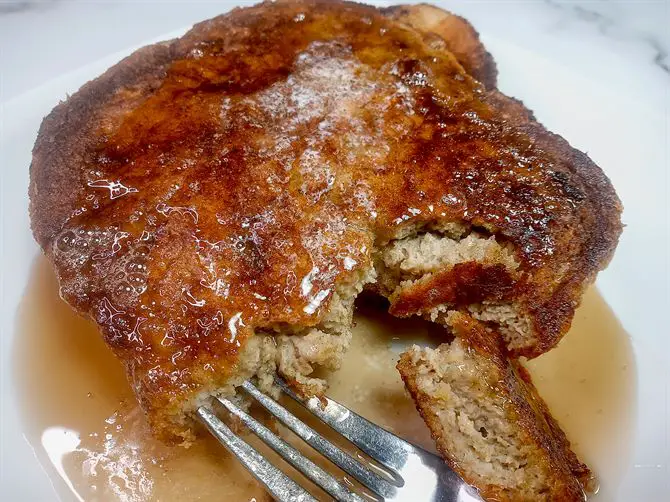
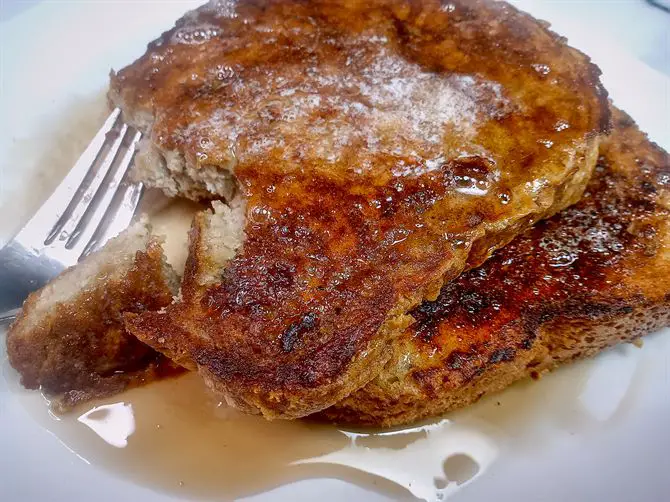
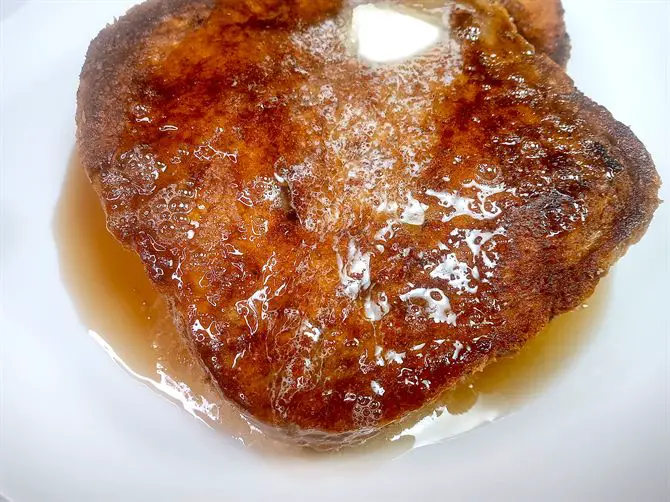
A Low Sodium French Toast is possible and it tastes great and is perfect for a special low sodium breakfast! A velvety, crunchy, rich outside that you want to rub your tongue on and a moist fluffy inside that soaks up the melted butter and syrup. Yum!
Be forewarned though that this recipe requires using a low sodium bread. The bread being the main sodium load in French toast. You can use store-bought low sodium bread but the best experience will be using my Low Sodium White Bread made in a bread machine. More on this later though.
Cinnamon, nutmeg, and vanilla imbue a satisfying flavor and requires no extra sugar in the batter. This recipe also uses extra egg yolk which gives the French toast that firmer and richer taste than even a regular French toast.
| Typical sodium amount per serving | 250-400mg |
| Sodium per serving for this recipe | 94mg |
| Calories per serving | 256 |
Sodium in French Toast
Most recipes seem to vary between 250-400mg of sodium per slice. And those are also usually a thinner than a standard thickness sandwich bread slice. Normally the majority of the sodium comes from the type of bread used. The sodium would normally be 150mg sodium just by itself for a standard slice of sandwich bread, let alone using any specialty bread.
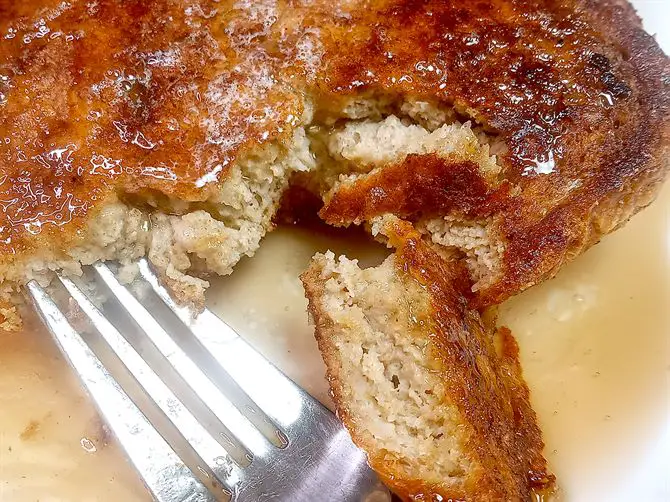
The sodium level in my Low Sodium French Toast is a comfortable level at 94mg of sodium per slice. These are nice thick slices at 3/4″ of an inch and generally just one slice on its own from this recipe will fill you up. You would certainly be feeling very full if you also combine some cut-up fruit with it.
The main source of the sodium in this particular recipe is actually from the eggs which contribute 74mg of sodium per serving. Since this recipe is very egg centered, it is also very high in cholesterol. So if that is something you are concerned about you should be careful. I won’t even get into the whole “Is egg cholesterol good or bad debate”.
To me it is acceptable because even for being within my sodium budget for a fantastic tasting Low Sodium French Toast, I would only make this a few times a year. Most likely only making it on a holiday weekend or a special occasion to worry if it is perfectly “healthy” or not.
Pick your bread carefully
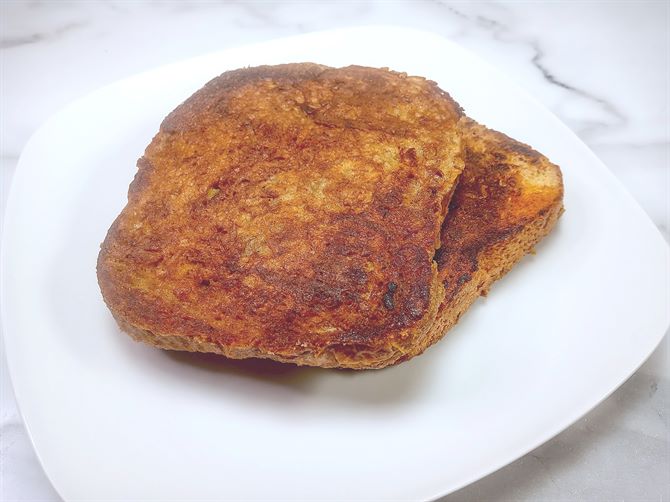
The bread you choose is the main contributor to the high sodium in regular French toast. Just using low sodium bread will knock out at least half of the sodium if no saltier ingredients were added. Particularly if you want a thicker slice that makes the best French toast the way it should be, but that probably won’t be with store-bought bread.
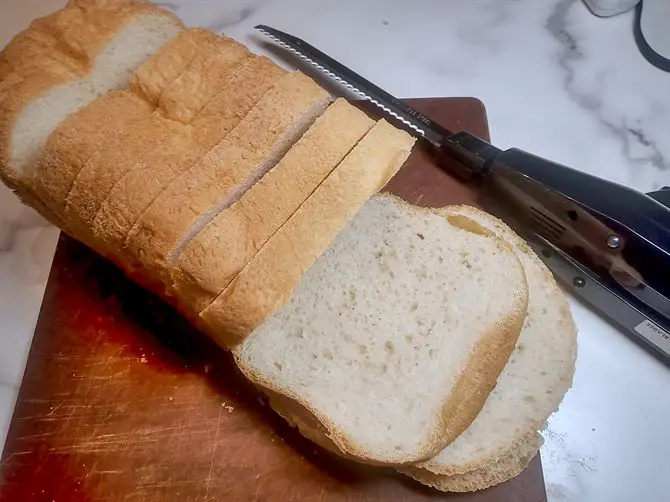
For me, the choice of bread that I use is easy since I make my own Low Sodium White Bread in a bread machine. With my bread, the sodium level is about 6mg for each 3/4″ thick slice. It is a great-tasting, solid bread that stands up perfectly to soaking up the egg batter and cooks nicely. It is what the nutrition value of the recipe is based on.
There are low sodium breads out there of various levels but I cannot easily find them at my local grocery stores. I am not going to drive to some specialty store when I just need a loaf of bread or order it online, but that’s me and why I bought a bread machine. Also with store-bought bread, you would just be using a thin slice that is half the size of what you will cut for this low sodium recipe.
By using my bread, there is no wimpy thin, soggy, limp low sodium French toast here! But yes, you can use store-bought bread and you might even cut back a bit on the egg batter if you use just the eight slices of wimpy bread. I have not used store-bought low sodium bread myself for French toast so otherwise cannot comment on it for its use here.
Dry bread Is best for making French Toast
French toast was traditionally made to use up leftover bread or stale bread. Dry bread helps the egg batter soak in without the slice of bread collapsing and turning into a doughy goo.
But with old bread, you need to watch out for mold and the crust becoming overly hard. This can often happen in just a few days with any fresh bread and even quicker with my low sodium bread. This is why when storing my bread I usually keep it in a sealed container in the fridge.
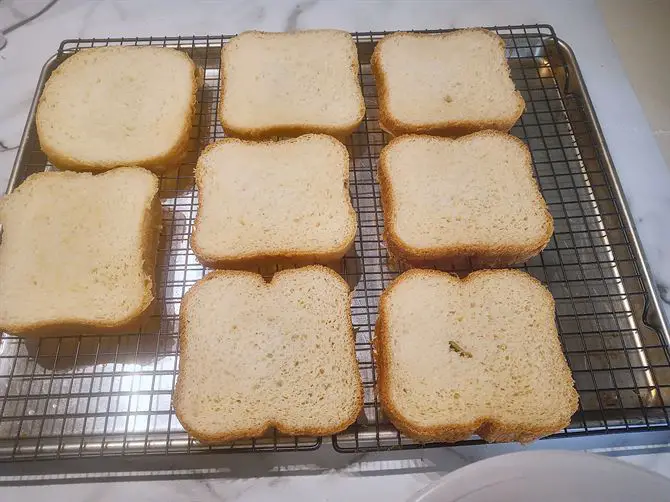
So for this recipe, I make the bread the previous day, slice when cooled, and store it in a Ziploc bag or container overnight. Then it is all ready to go the next morning for the quick-drying process which dries the outside while leaving the inside relatively moist.
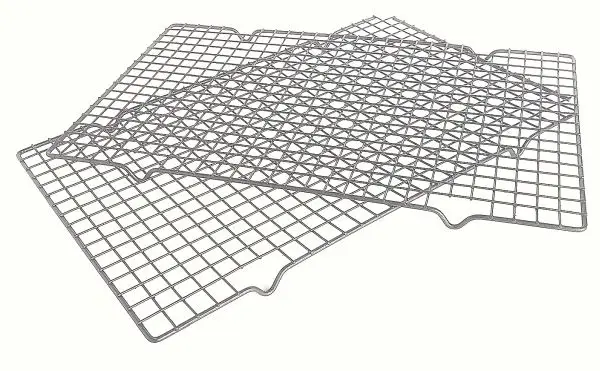
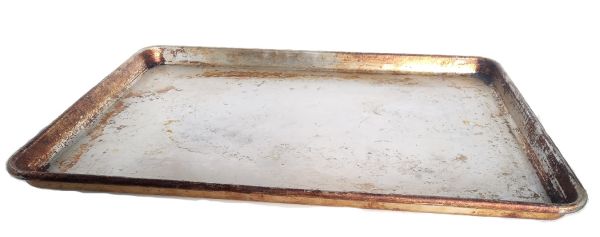
This is really easy to do and you can make your egg batter and preheat the skillet while the bread drying. Simply place a wire rack on top of a baking sheet and place bread on the rack in a single layer. Place in a 275°F preheated oven and bake for 12 to 15 minutes. This will dry out the tops and bottoms but not toast the bread. When done remove the baking sheet from the oven and place dried bread on a ready plate.
I use butter and oil over medium-low heat
Cooking oil is long known to slow down the browning and smoke point of the butter. But it doesn’t stop it altogether and still lets it develop that nutty brown butter flavor at a slower pace in a semi-hot pan. It also cuts down considerably on the saturated fat of just using butter by itself. Canola oil has 14g total fat and 1g saturated fat compared to butter at 11.5g total fat and 7.3g saturated fat per tablespoon.
Canola oil is a great neutral oil to use as it won’t overpower the flavor of the butter while still achieving a crisp surface on the toast.
When French toast is done?
It’s all up to you, some people like a center that is moist and some like it cooked through and dryer. By cooking on a medium low heat you can cook all the way through without burning the outside. Generally, you will be cooking about two minutes per side for a crispy but still moist inside. Keep an eye on the time and taste test your first one from the skillet. Adjust the timing according to your preference. If it is your first time making this, cook only one slice first while keeping an eye on the time till you get a “feel” for it.
Some other tips for cooking the best Low Sodium French Toast
When you’re soaking the bread slices in the batter, be sure to let it sit for about 20-30 seconds on each side so it has time to soak up the egg mixture. This fits nicely into the cooking time of the French toast put in the skillet previously. It will continue to soak through when removed and placed on the “on deck” next to be cooked plate.
When soaking the bread in the batter mixture be sure to use a flat bottom pan or container. The first time I made this recipe I used a large Tupperware container that the bottom bulged up and not all the bottom of the bread soaked up the batter evenly. Especially towards the end when the mixture was running out.
The real trick to making perfect French toast is to pay close attention as you soak and cook the bread. It really mostly depends on the bread you use, the thickness of it, and how hearty it is. Get the next pieces of bread soaking as soon as you put the previous batch in the skillet. It should take less than a minute soaking for both sides. Then remove to a plate and let it continue to soak in while the previous pieces are finish cooking.
Note that the nutmeg is optional but it adds a certain something that I have yet to put my finger on. But cinnamon, oh cinnamon, is not optional. It’s not even worth making French toast without it. Even better is to use roasted cinnamon as I have here. It adds a deeper flavor of cinnamon but regular is ok too.
French toast is best cooked on a medium-low setting so it cooks all the way through without burning the outside. But be sure it is heated up enough beforehand, by dripping a few drops of water so it sizzles off to test the readiness.
French toast is best kept warm in the oven, while cooking the rest, on a baking sheet at the lowest setting until ready to serve. Keeping it warm in the oven will keep the outside nice and crispy, or go ahead and serve immediately.
Whisk batter between bread soakings
The cinnamon has a tendency to float to the top of the batter in the pan. After the first few bread slices soak, it would almost all be used up. So make sure to give the batter a quick stir or whisk in between soaks to keep the cinnamon well incorporated.
Why add cornstarch to the batter?
Adding cornstarch to the French toast seems to work just like when it is added to something that is fried much like my Sweet and Sour Chicken. It helps to crisp up the bread and egg and adds a silky texture. This will prevent your toast from being just a piece of bread with a fried egg outer covering.
BE AWARE OF SODIUM LEVELS IN SYRUP!
Many off the shelf store bought syrups vary widely in the amount of sodium. And many regular name brands can be quite high at 120 mg+ per 1/4 cup. Look for a natural syrup, for instance, this Log Cabin Natural Syrup is just 20 mg per 1/4 cup. Honey and some fruit syrups and jams also make for some delicious low sodium alternatives.
Keep French toast warm till serving
After cooking the French toast place it on the baking sheet used earlier in the oven that is set to 200°F or lowest temperature. That will keep it warm and crunchy until you are ready to serve.
Freezing French Toast?
French toast makes a great quick reheat-able breakfast because it reheats so well and quickly! To freeze French toast, after cooking allow it to cool completely preferably on a wire cooling rack to reduce moisture. Store the French toast in a Ziploc freezer bag for up to 1 – 2 months.
Reheating French Toast
Personally, I just reheat it in the microwave for one minute. You can put a pat of butter and syrup on before or after you reheat it. I like putting them on before as everything melts down and is nice and hot. It won’t be as crispy but still tastes great.
You can reheat in the oven at 250-300°F on a baking sheet for 6-7 minutes. Personally, I would not heat up the oven unless you are reheating a whole batch. I just don’t find it worth the time and oven energy.
Recommended Equipment & Ingredients For This Recipe. This equipment section contains affiliate links to products I use and recommend.
Bread Machine
Cast Iron Skillet
Large Baking Sheet Pan
Electric Knife
Baking/Cooling Rack
As always, please let me know how you like this recipe in the comments! I get motivated when I hear from you and interested to learn about how you liked and served your Low Sodium French Toast. So please, leave a comment or rating and share any tips you might have. You can follow me on Facebook and Pinterest also, for new recipes.
Low Sodium French Toast
Ingredients
- 8 3/4-inch Low Sodium White Bread (Recipe based on my Low Sodium White Bread)
- 8 large eggs
- 4 large egg yolks
- 1/2 cup half-and-half cream
- 1 Tbsp vanilla extract
- 1 tsp roasted cinnamon ( or regular ground cinnamon)
- 1/8-1/4 tsp nutmeg
- 1 Tbsp cornstarch
- 3 Tbsp unsalted butter (divided)
- 4 Tbsp canola oil (divided)
- Unsalted butter and a low sodium maple syrup (for serving)
Preparation
- It is best to use my Low Sodium White Bread recipe made the day before for this recipe. Slice 3/4” thick pieces, should yield about 8 slices. Store bought low sodium bread may be used but soak and cooking time may need to be adjusted.
- Fresh bread is best to dry out in the oven. It will still be fresh and not have time to turn stale, develop mold, or be completely dry in the middle. Preheat oven to 275°F. Place bread on a wire rack that is on a large baking sheet in a single layer and bake for 12 to 15 minutes. This should not toast or brown the bread, but just dry out the tops and bottoms. Remove from the oven when done.
- Reduce the oven temperature to 200°F to keep the cooked and finished toast warm. Transfer the dried bread to a plate ready to soak and cook. Place baking sheet back in oven for warming finished French toast.
- Preheat nonstick frying pan or skillet over medium low heat.
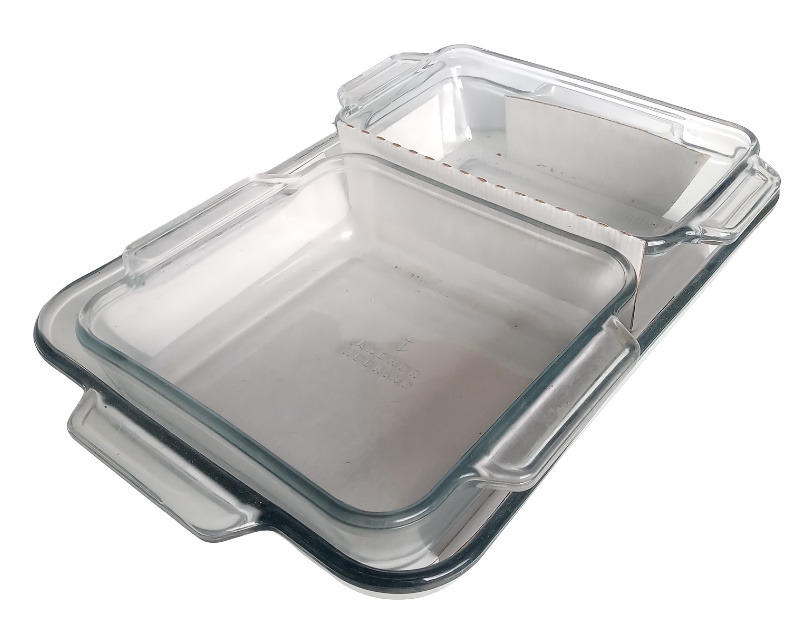
- While the bread is drying, prepare the egg batter in a medium mixing bowl by whisking the eggs, egg yolks, half-and-half, cornstarch, vanilla, nutmeg and cinnamon, until frothy just like scrambled eggs. Pour into a flat bottom 9×13-inch glass or metal baking dish or anything with a flat bottom and able to fit 2 slices.
- Start by slowly lowering one side of the bread in the egg mixture and let sit for 20 to 30 seconds. Flip in the same manner for the same amount of time. Remove to a secondary plate while preparing pan to cook. Toast should be soaked but not soggy.
- Prepare the cooking skillet by adding about 3/4 tablespoon of unsalted butter and 2 tablespoon of oil in nonstick frying pan or skillet. When the butter is melted tilt or scrape to coat bottom of pan.
- If you are not familiar with cooking French toast start with one slice first as follows:
- To cook the French toast take the two slices from your presoaked ready plate and place onto the hot melted butter and oiled pan. Cook until golden-brown on the bottom, 1 1/2 to 2 minutes for a 3/4-inch-thick slice, or about 30 seconds less for a standard slice thickness. Flip the bread over and cook and repeat for the same amount of time and is golden-brown. Adjust the heat as necessary if the bread is getting too dark too fast.
- While the first 2 slices are cooking, soak the next 2 bread slices in the egg batter 20 to 30 seconds each side and remove to the “on deck” plate waiting to cook. Batter will continue to soak in nicely.
- When the first batch is finished, transfer the French toast to the baking sheet in oven if serving immediately.
- In the same manner, cook the remaining bread slices.
- Serve immediately with unsalted butter and low sodium maple syrup.
Notes
Utensils & special ingredients used

I use, own and recommend these products and ingredients used in this recipe and I may earn commissions from qualifying purchases.
Nutrition
The information shown is an estimate provided by an online nutrition calculator. It should not be considered a substitute for a professional nutritionist’s advice. Please understand that not everyone’s sodium and dietary requirements are the same, therefore some recipes may be higher than you’re allowed.
https://tastyhealthyheartrecipes.com/main-dishes/breakfast/low-sodium-french-toast/© 2024 Tasty Healthy Heart Recipes

Nutrition Information – The information shown is provided by an online nutrition calculator. It should not be substituted for a doctor’s or nutritionist’s advice. Please understand that not everyone’s sodium requirements are the same, therefore some recipes may be higher than you’re allowed. Always consult with your doctor for your recommended daily sodium allowance.